[intro] In this Guide, you’ll learn how to create an account on Google Analytics (GA4), allowing you to create Google Tags, which can be used to monitor the traffic to your EKM online shop. [/intro]
Before you begin, you need to have added a domain name to your EKM online shop and installed the Google Tools feature.
[tips]Before you begin, it’s a good idea to open a Google/Gmail account beforehand, so that all your Google products can be linked to the same account, which makes things easier for management and authentication purposes. To open a free Gmail account, click here. [/tips]
Opening a GA4 account
1. To begin, log into your Google account and click here, then click the blue button in the top right-hand corner: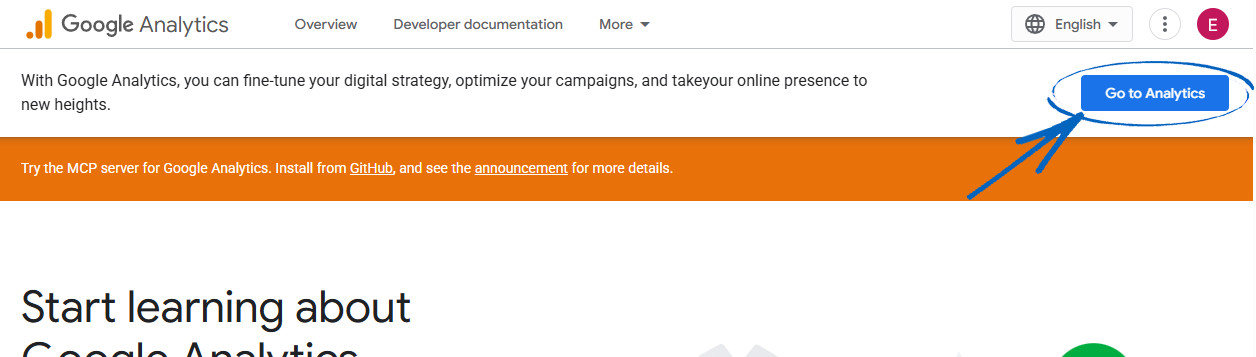
2. Click the blue button in the middle of the page: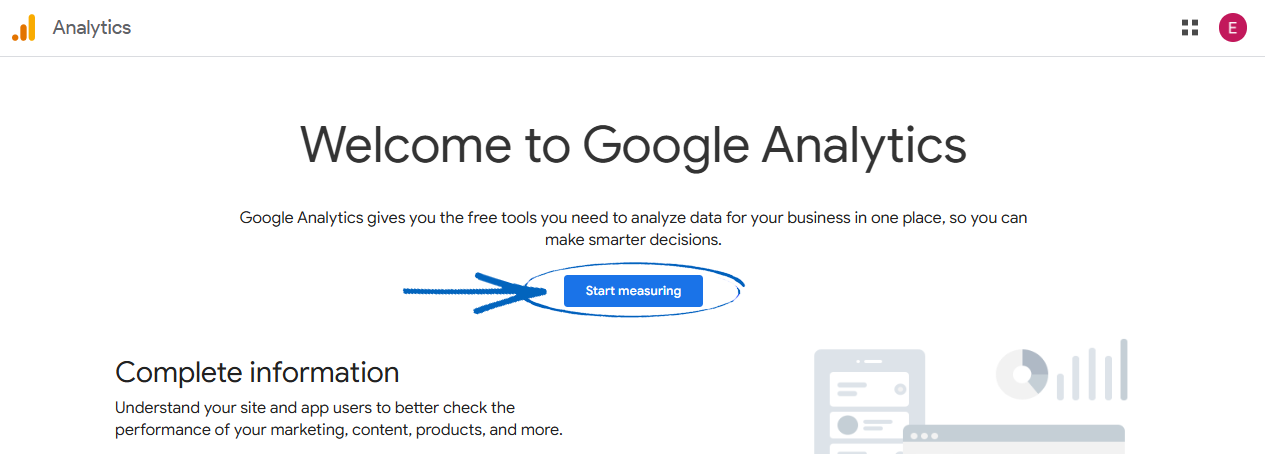
3. Give your account a name - typically this would be the name of your EKM online shop - in the field provided, before scrolling down a clicking the blue Next button on the left-hand side: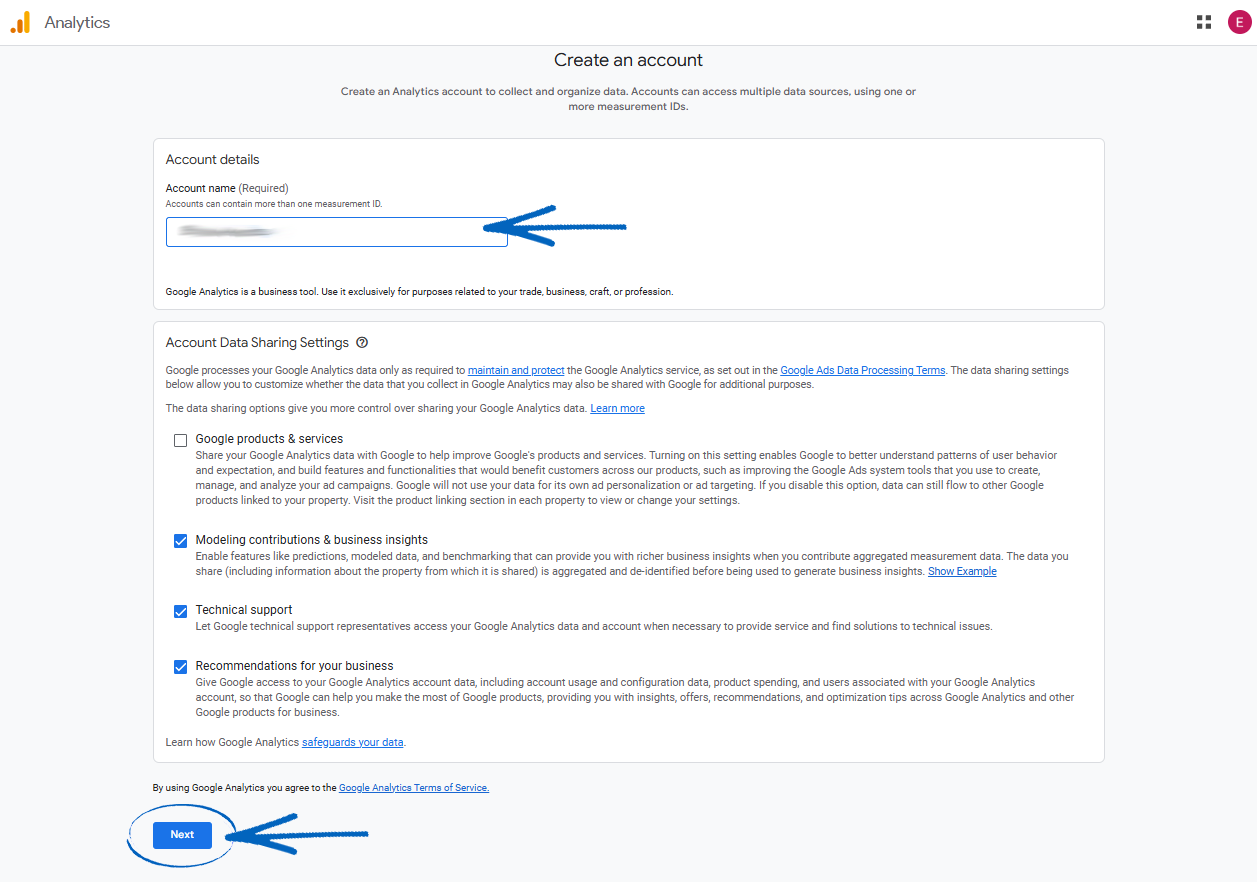
4. Now you need to add the name of your EKM online shop into the Property Name field, and select the relevant Time Zone and Currency from the drop-down menus provided before clicking the blue Next button on the bottom left-hand side: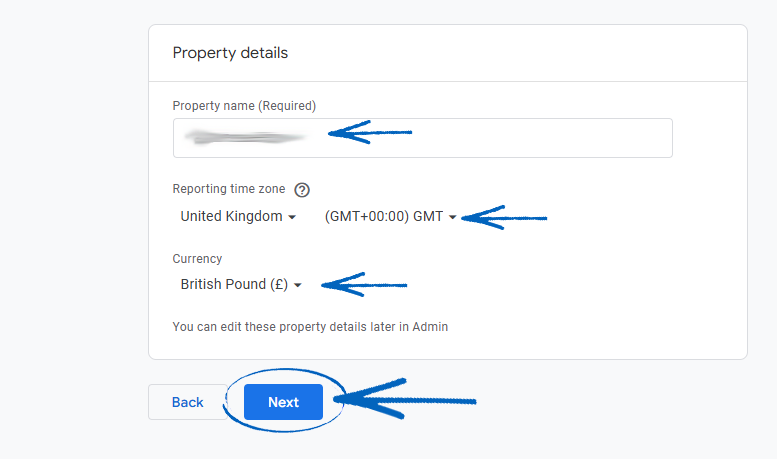
5. Tick the relevant boxes here, before clicking the blue Next button in the bottom left-hand corner: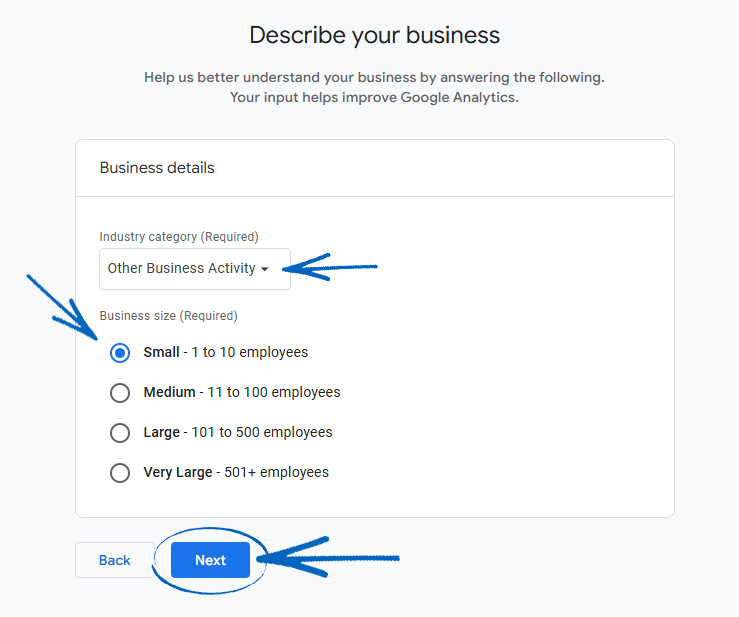
6. Tick the relevant boxes here, before clicking the blue Create button in the bottom left-hand corner: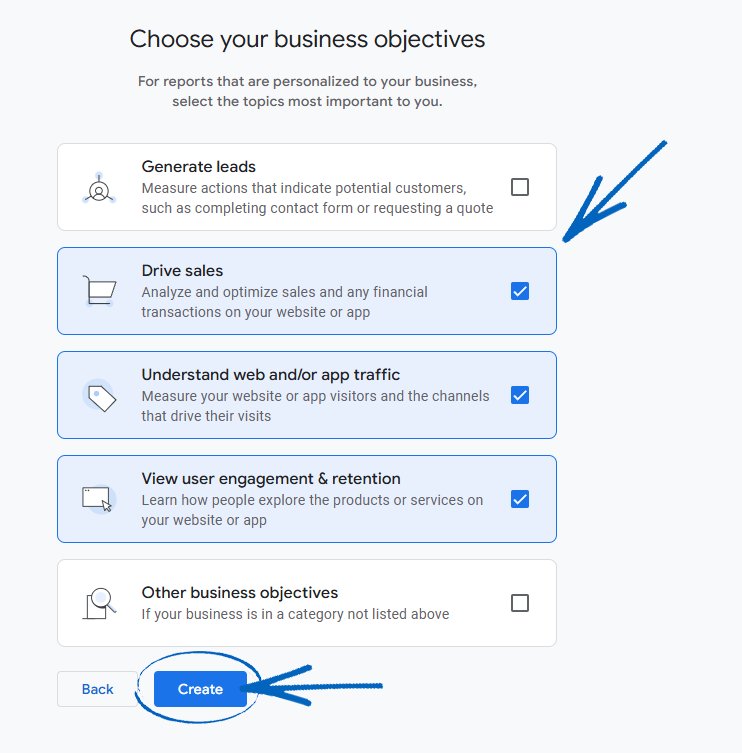
7. You’ll then see a Terms of Service window appear. Select the relevant country from the drop-down menu, tick the box and click the I Accept button: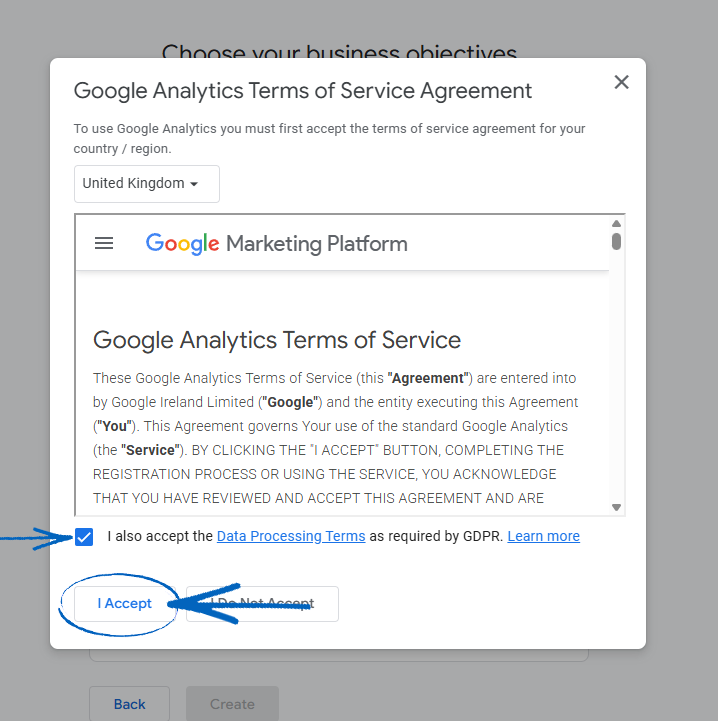
8. Click the Web button: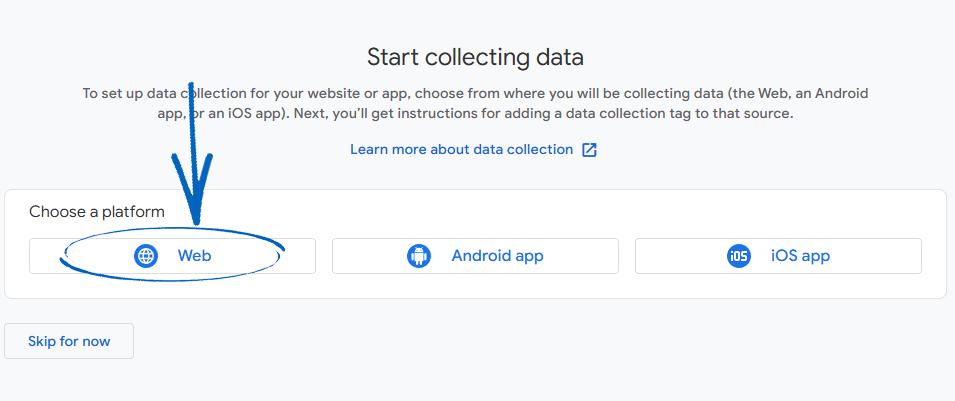
9. Add the URL of your EKM online shop in the field provided, and add the name of your EKM online shop in the Stream Name field, before clicking the blue Create & Continue button in the top left-hand corner: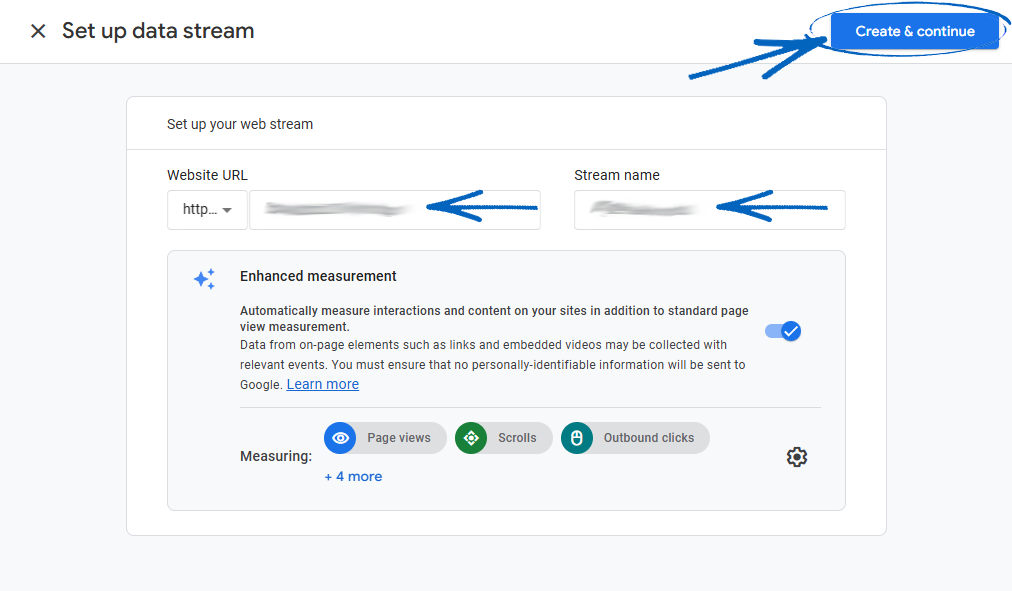
10. Now you need to click the copy symbol to copy your Google Tag code: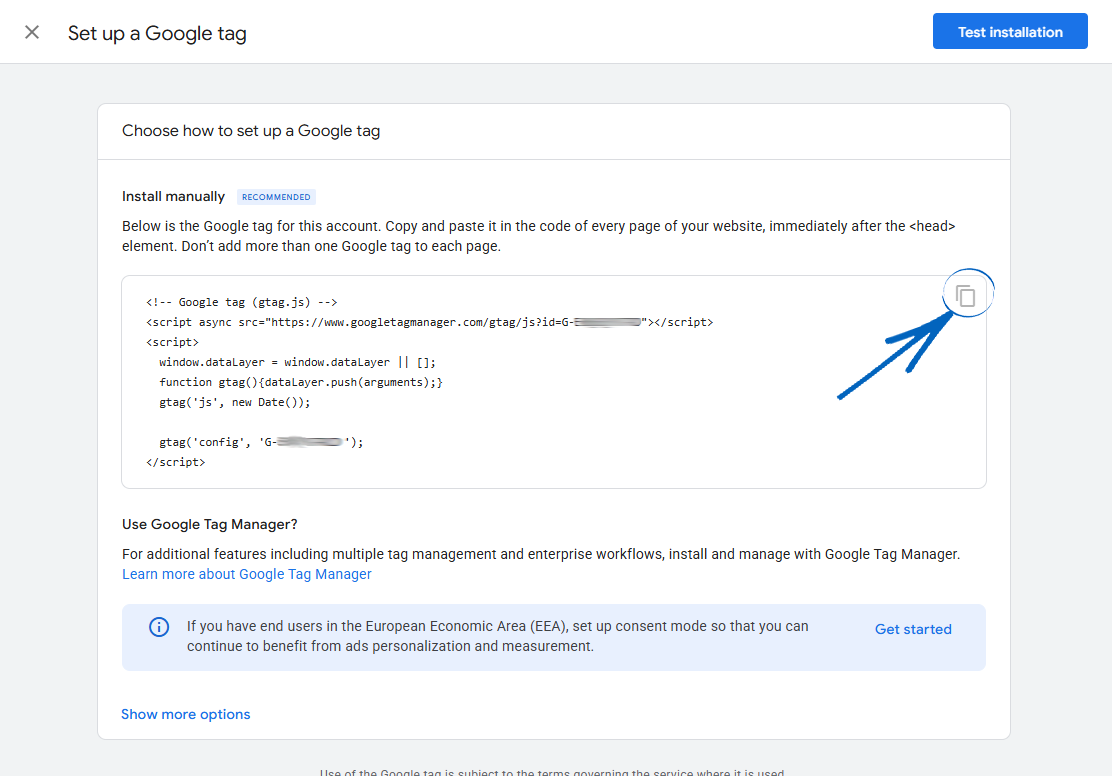
Installing your GA4 on your EKM online shop
11. Now you need to install the relevant code on your EKM online shop so Google can track the data. On a separate browser tab, log in to your EKM online shop. From the Dashboard, click the Design tab: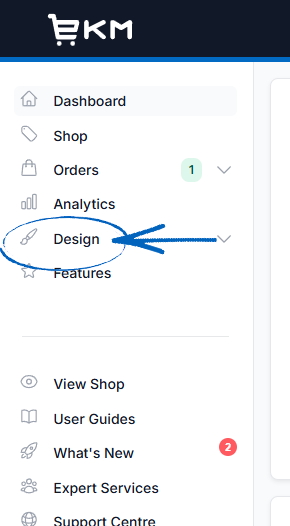
12. Click the Edit button on the bottom left-hand side, and then click Inject Custom Code from the drop-down menu: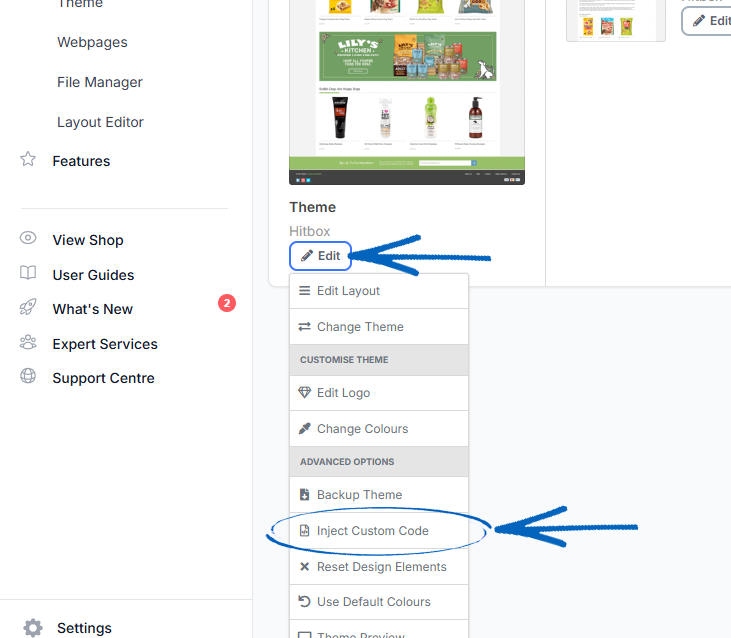
[remember]If you don't see a More Actions button on the left-hand side, click the Edit button that will be in that area instead, select Advanced Options and then Inject Custom Code.[/remember]
13. In the HTML Head Code field, paste in the code from your Google, before clicking the green Save button in the bottom right-hand corner: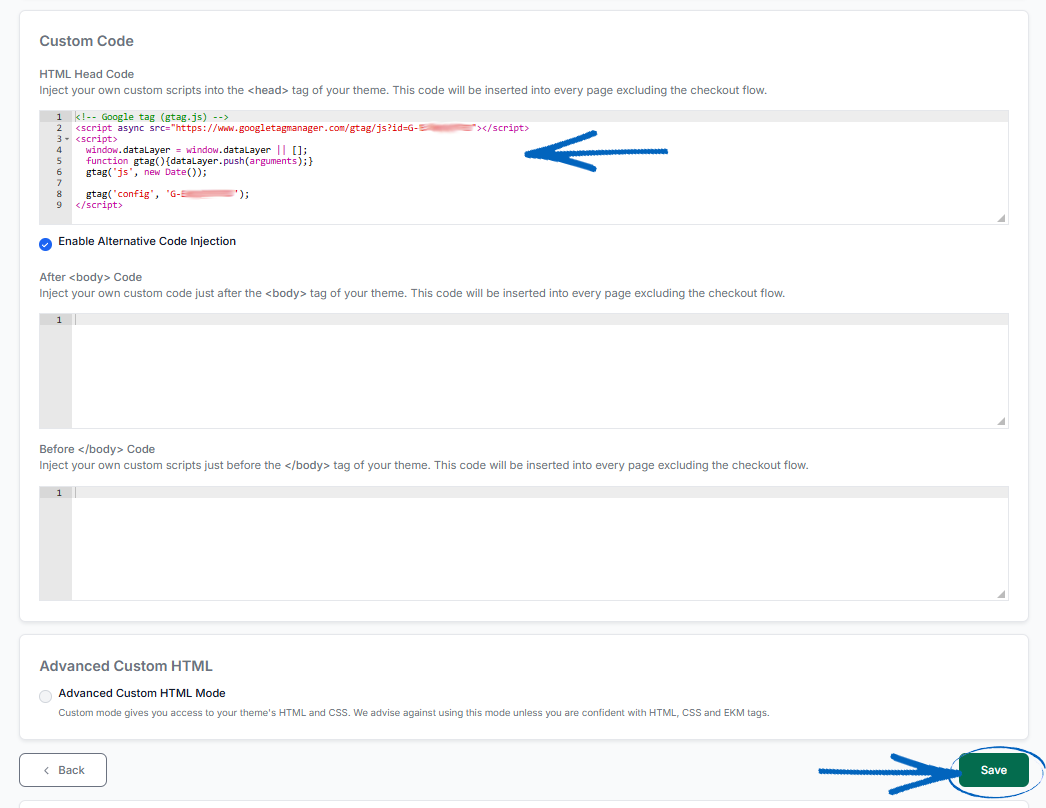
[remember]If you can't see the After <body> Code field, tick the box to Enable Alternative Code Injection for these fields to appear. [/remember]
14. Return to the browser tab displaying GA4, and click the blue Test Installation button in the top right-hand corner: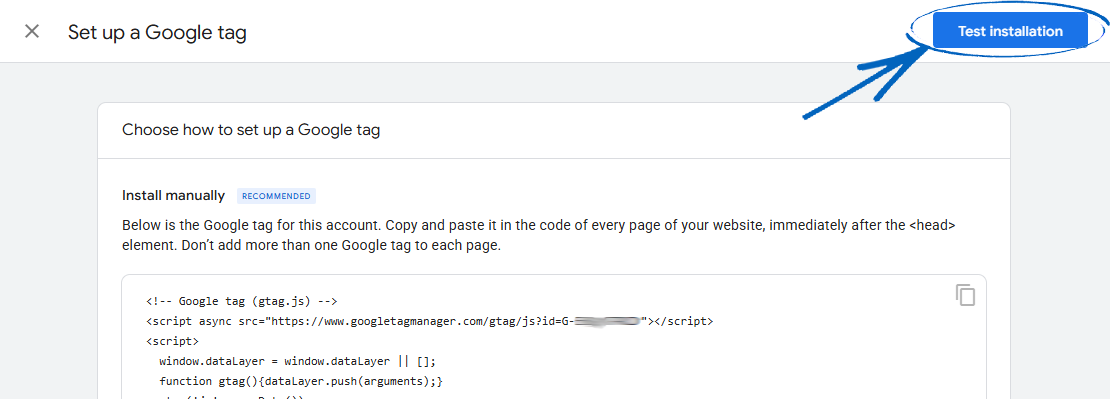
15. You should then see the notification at the bottom of the page. Click the blue Confirm button in the top right-hand corner: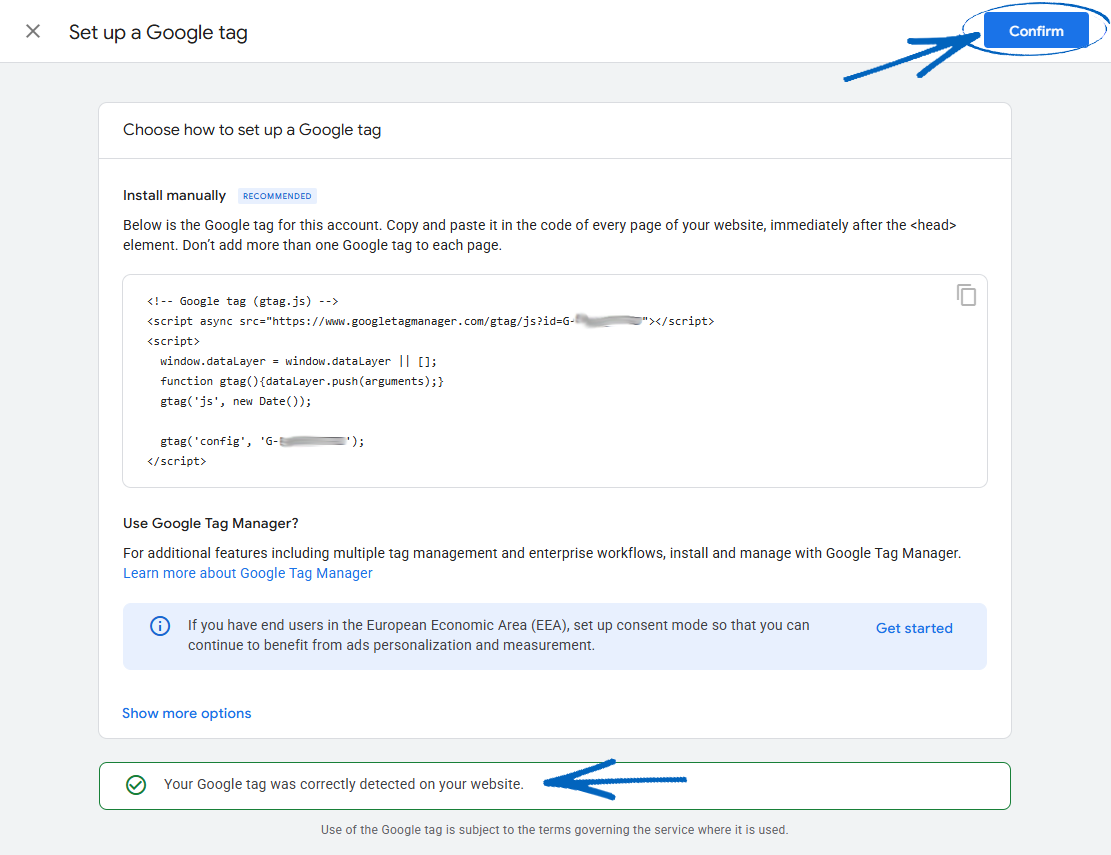
16. You’ll then be redirected to this page: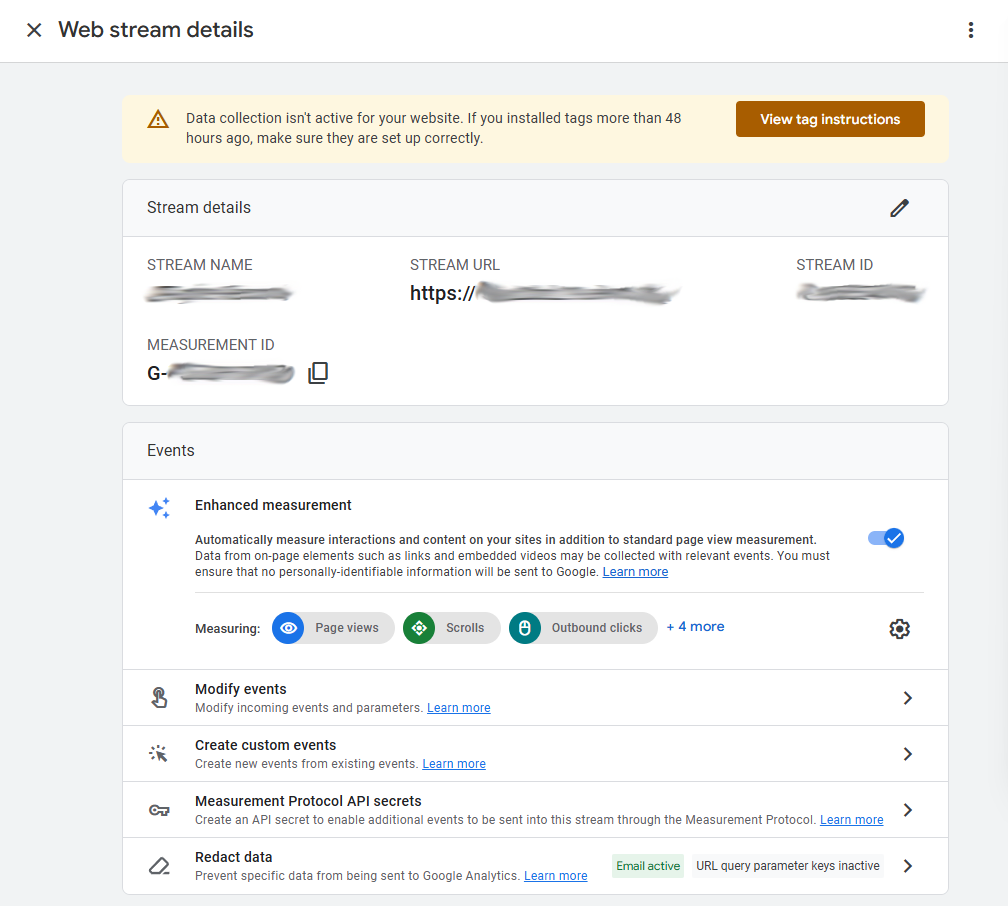
17. Scroll down and click the arrow symbol to the right of ‘Configure Tag Settings’: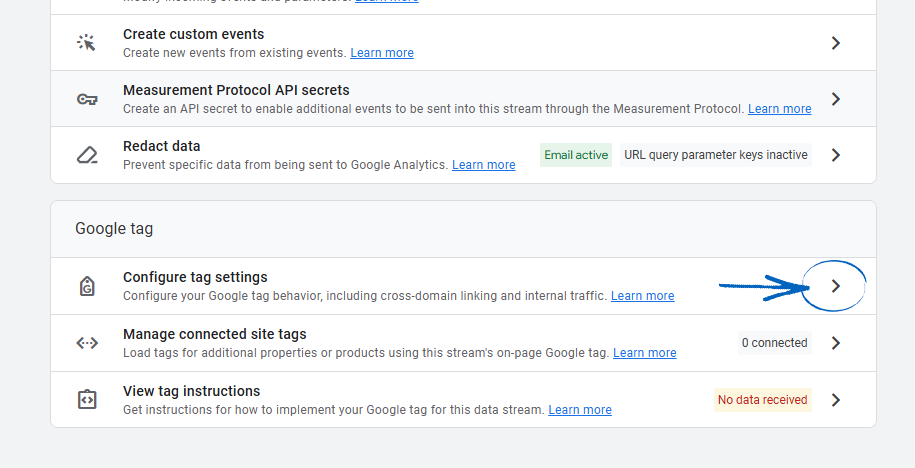
18. Click Show More at the bottom of the page: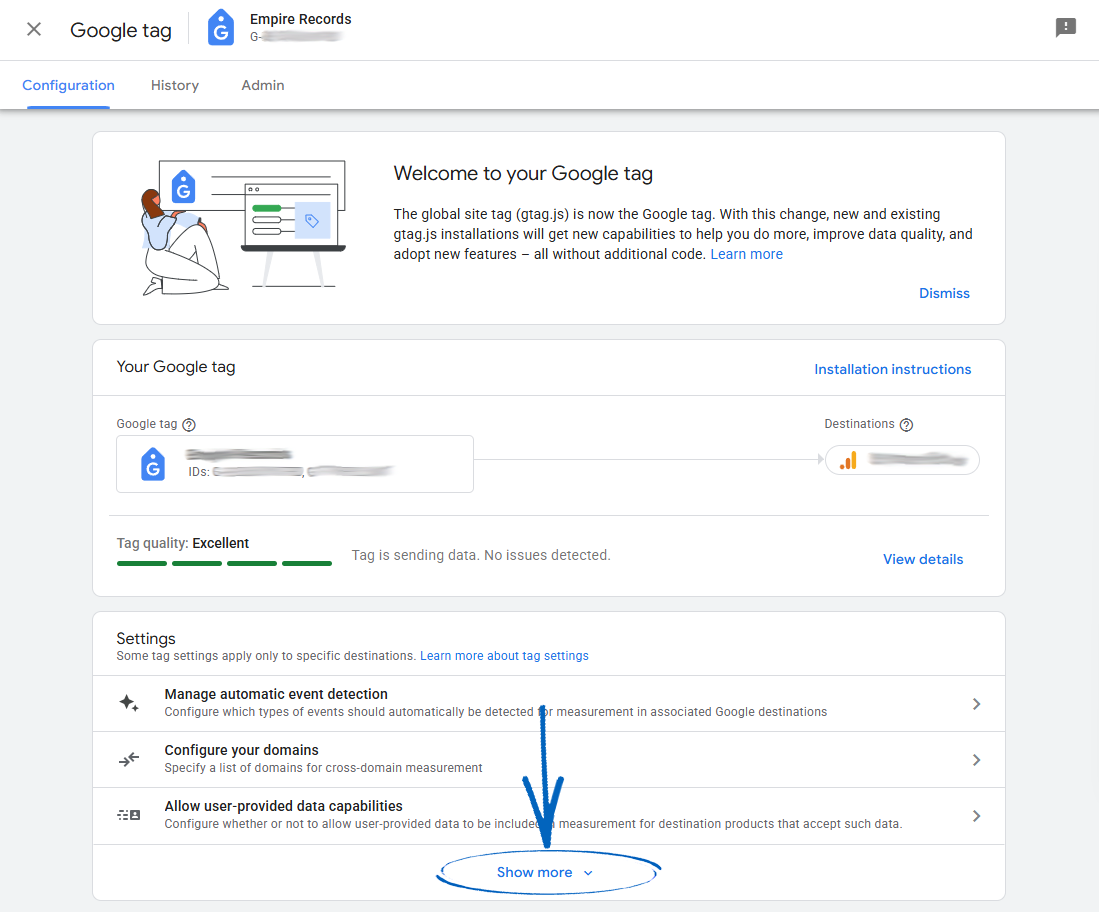
Defining Internal Traffic
19. For this step, you need to define your internal traffic and unwanted referrals to ensure that any visits to your EKM online shop from yourself or any third parties (such as payment gateways, for example) are excluded from genuine customer activity. Click the arrow symbol to the right of Define Internal Traffic: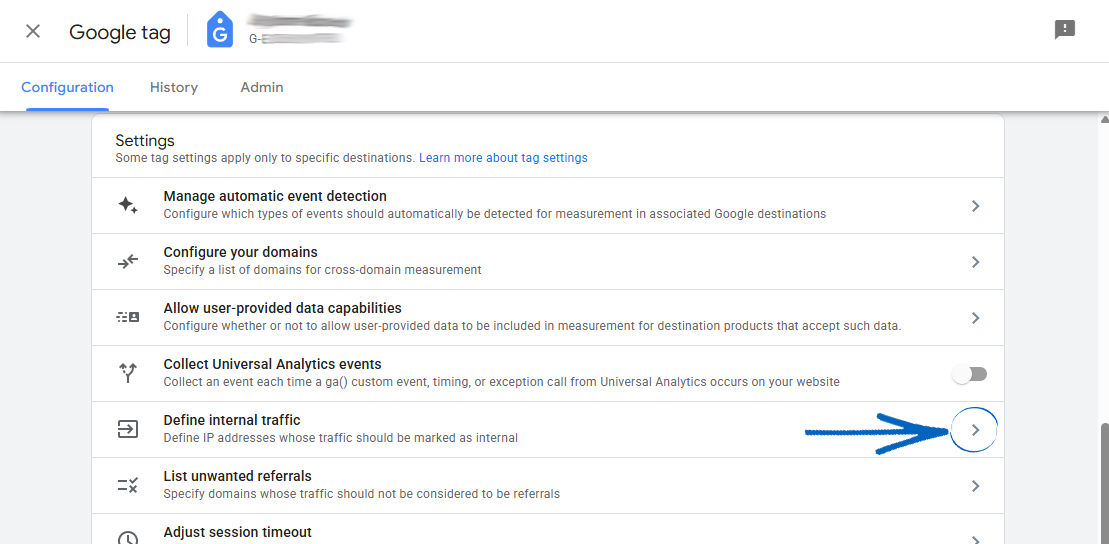
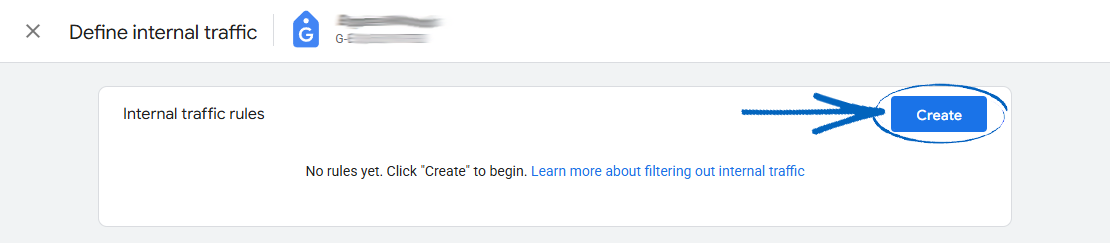
20. Click the blue Create button:
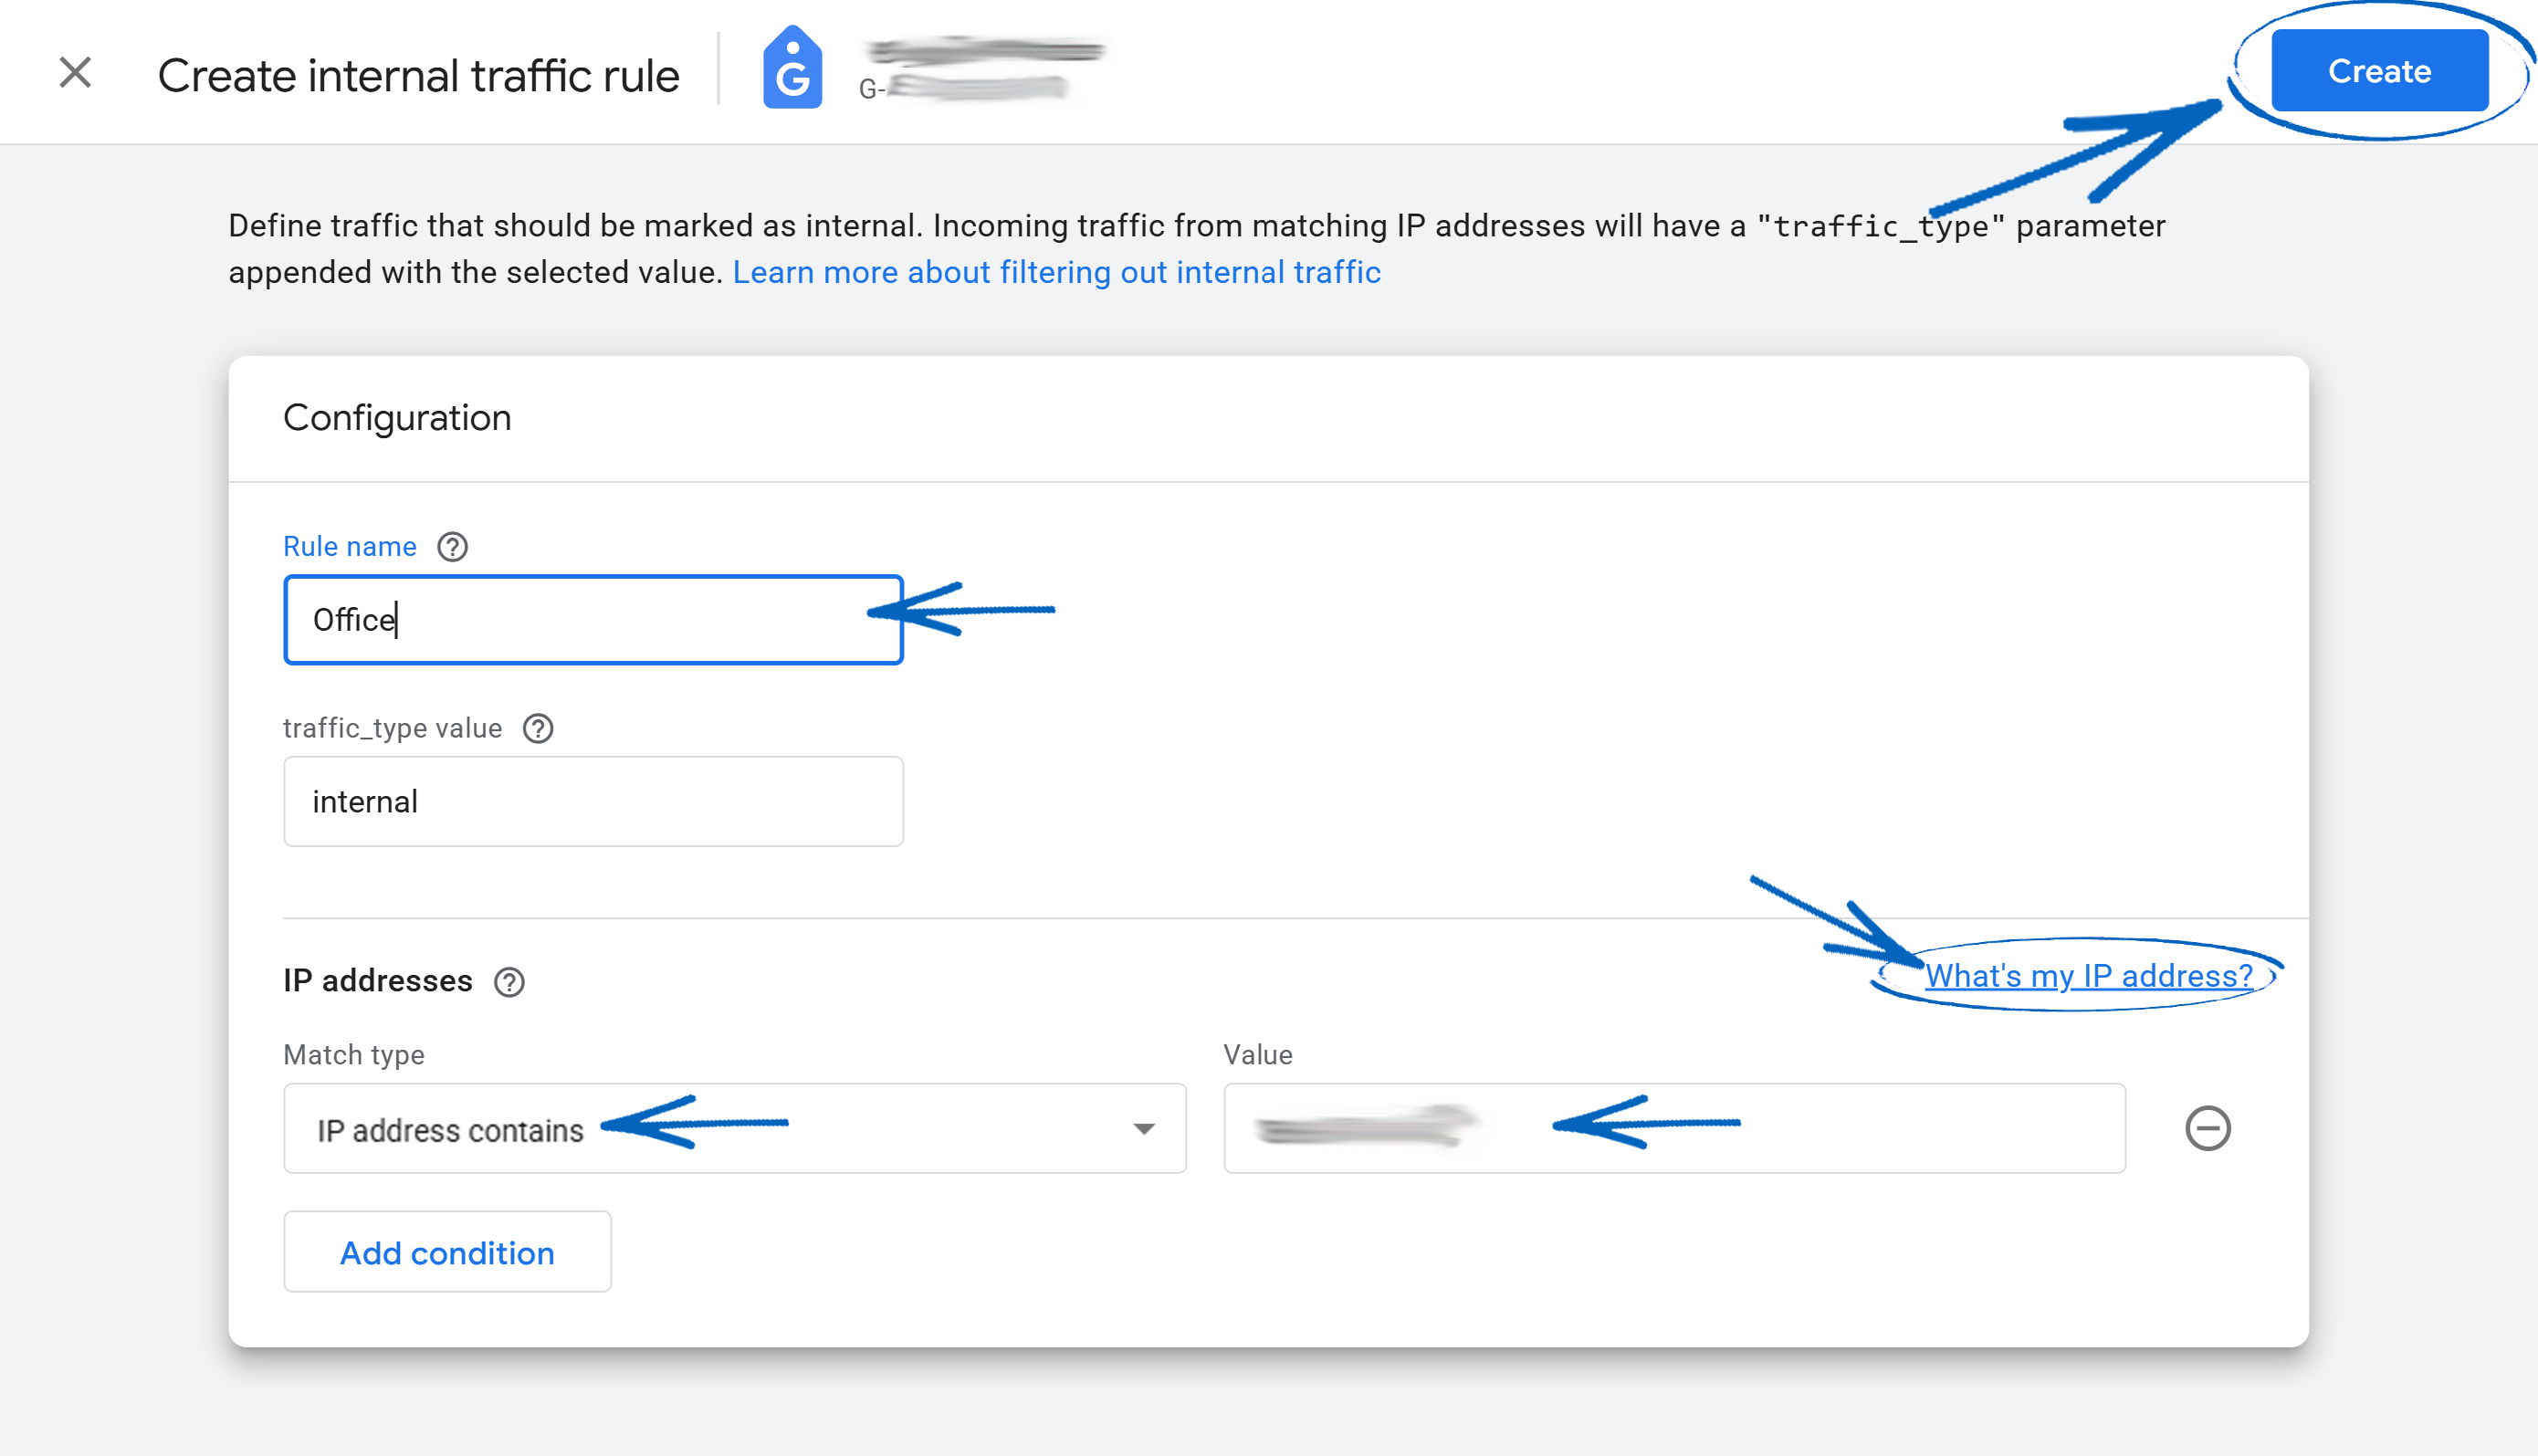
21. To define your internal traffic, note your public IP address. You can do this by clicking ‘What's my IP address?’ in the right-hand corner. In the Rule Name, add something to describe your location, and use the Match Type drop-down to select ‘IP Address Contains’. Paste your IP address into the Value field before clicking the Create button in the top right-hand corner:
22. You’ll then see this page. Click the X in the top left-hand corner: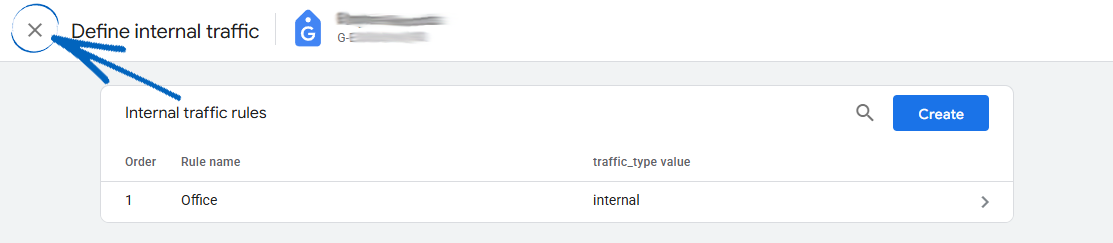
[tips] You can learn more about filtering internal traffic by clicking here. [/tips]
Listing Unwanted Referrals
23. Unwanted referrals occur when a customer is redirected from their third-party payment gateway back to your EKM online shop as the final step of completing their transaction. To prevent this activity from being wrongly counted as a genuine ‘shopping activity’, scroll down and click List Unwanted Referrals: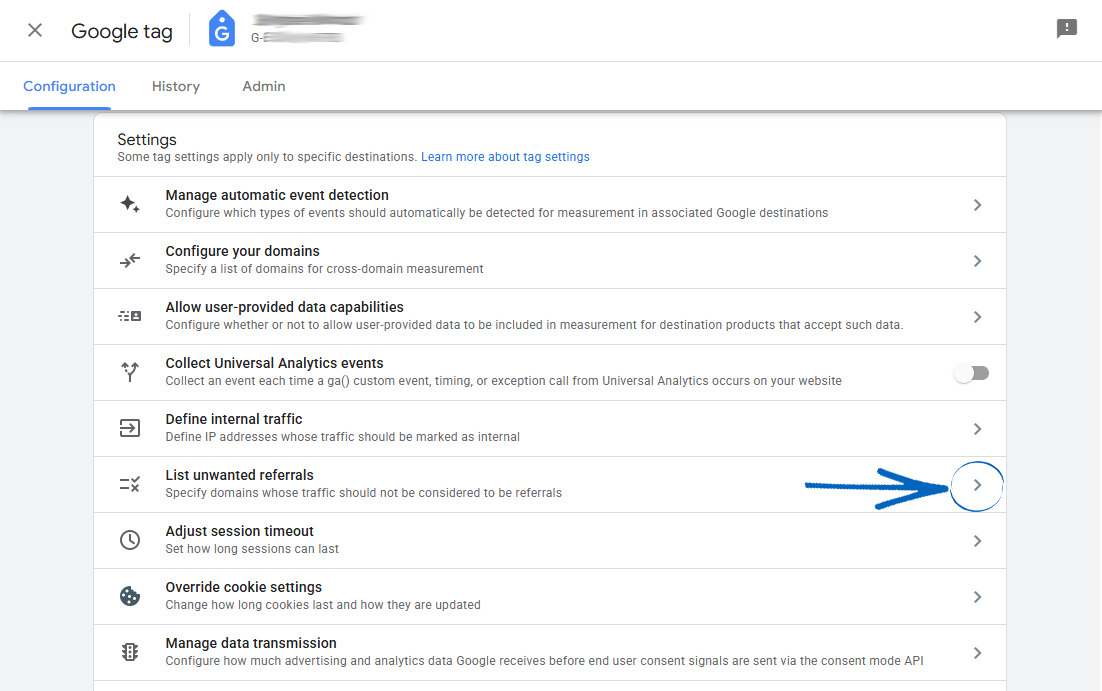
24. On the Match Type drop-down menu, select ‘Referral Domain Contains’ and in the Domain field, add the URL you would like to exclude. Then you need to click Add Condition to add additional URLs: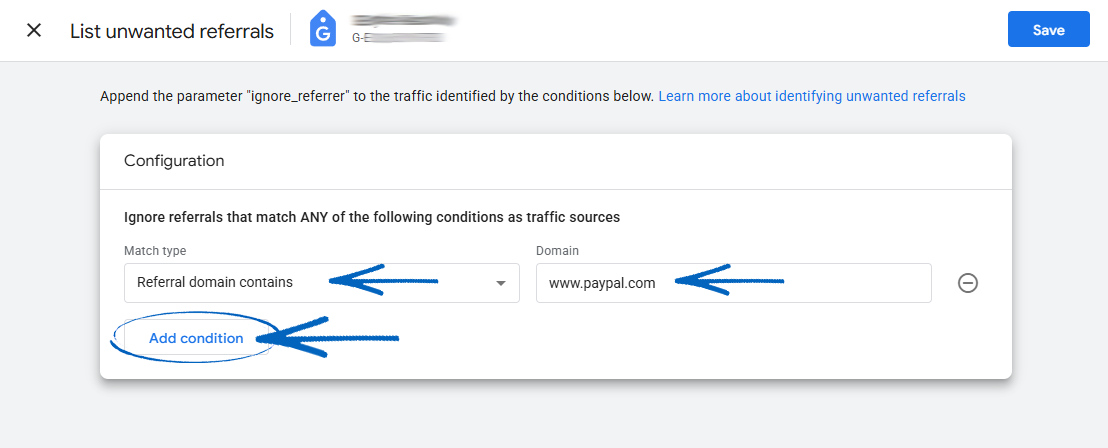
25. You will need to exclude the URLs of external payment gateways - such as Klarna, PayPal and NOCHEX, for example - the referring page of your checkout flow and any URLs related to the back end of your EKM online shop, so they are not wrongly counted as referring URLs. Use this image as an example: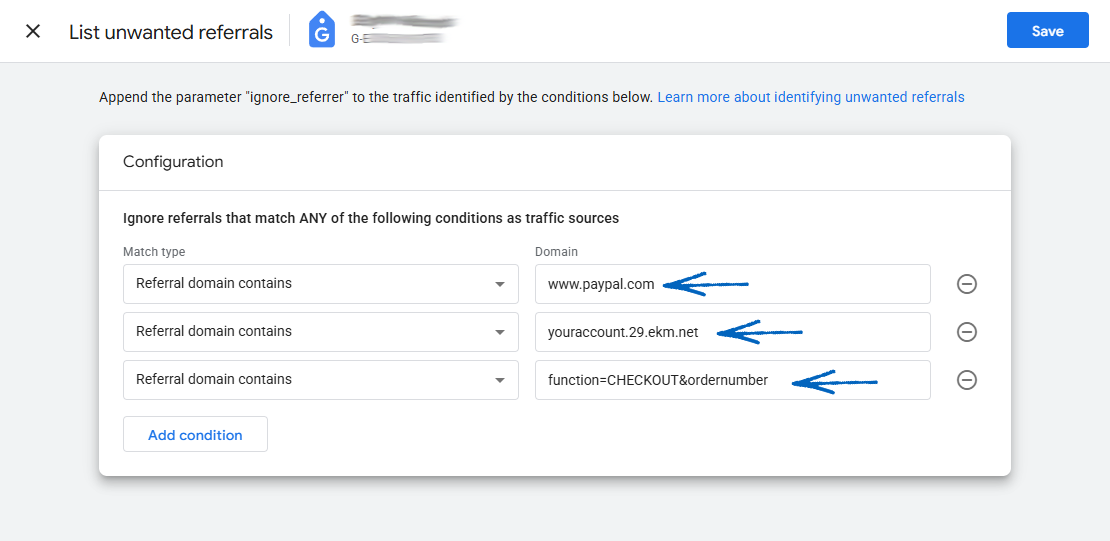
26. Don’t forget to amend the server number in the first URL to the one for your own EKM online shop. You can see the server number by looking at the address bar of your browser when you are logged into your account: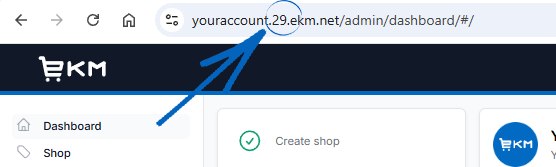
[remember]If you use EKMPay on your EKM online shop, you don’t need to add this to your unwanted referrals list.[/remember]
27. When you have finished adding URLs, click the Save button in the top right-hand corner: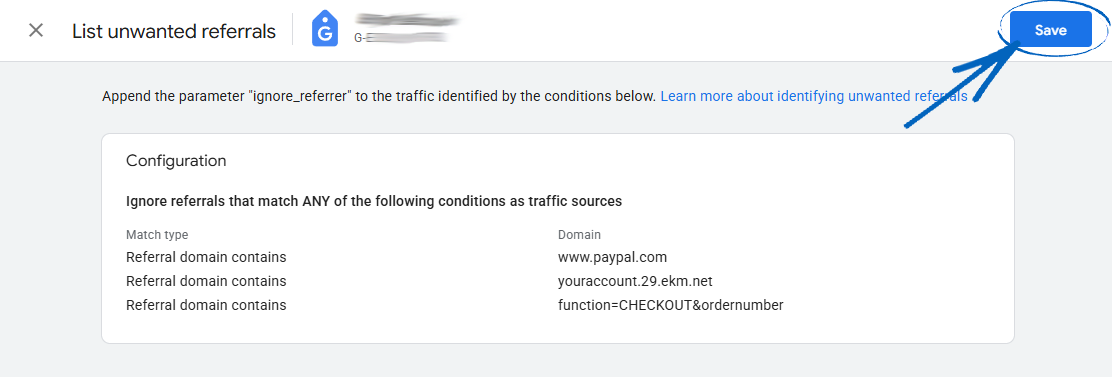
[tips]You can read more about unwanted referrals by clicking here. [/tips]
Override Consent Mode Defaults
28. For this step, you need to configure settings so that data is recorded when your customers approve it using the EU Cookie Bar feature in your EKM online shop. Click the arrow symbol to the far right-hand side: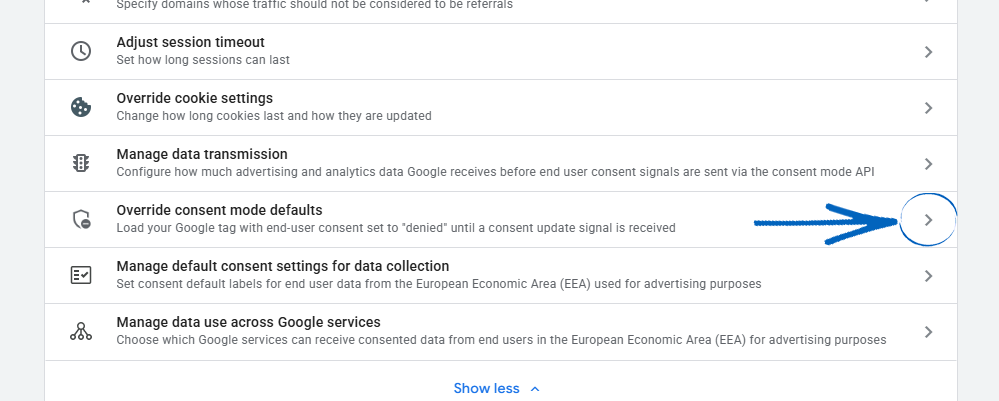
29. On this page, scroll down and click each of the switches to turn them on, before clicking the blue Save button in the top right-hand corner: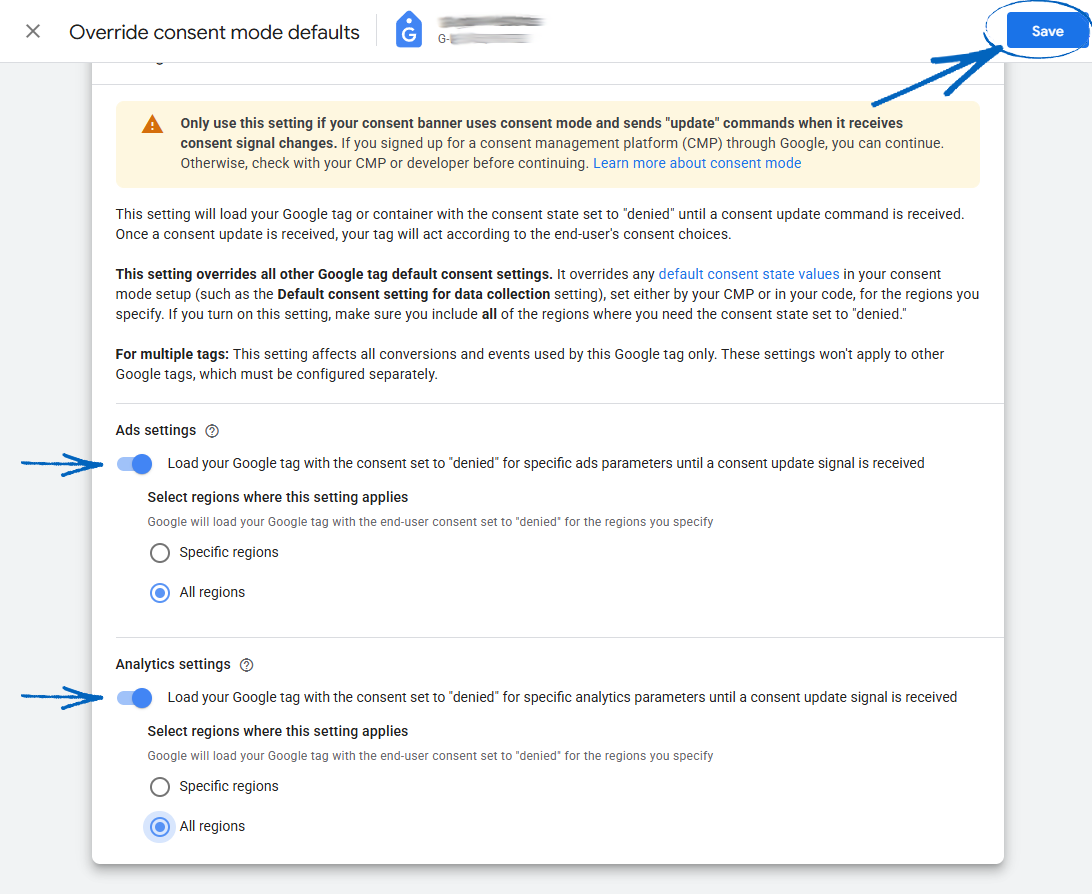
Create Custom Events
30. During this step, you need to configure your settings so that GA4 is aware that your EKM online shop is an ecommerce website and what the checkout process is, so the correct data can be recorded. Scroll down and click the arrow symbol on the right-hand side: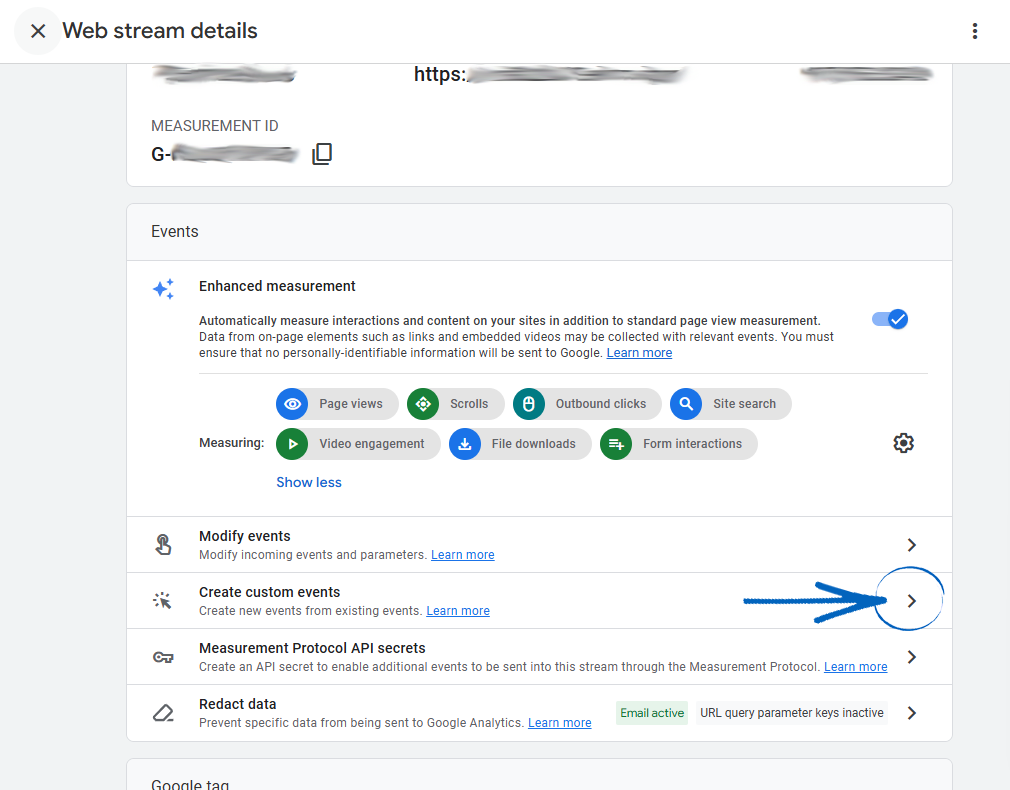
31. Click the blue Create button:
32. Give the event a name in the field provided, and then click the switch to mark this as a Key Event: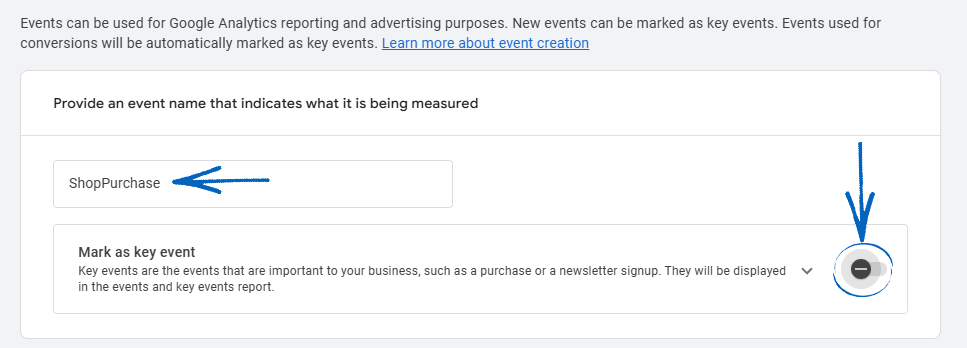
33. Amend the drop-down menu to British Pound and then scroll down: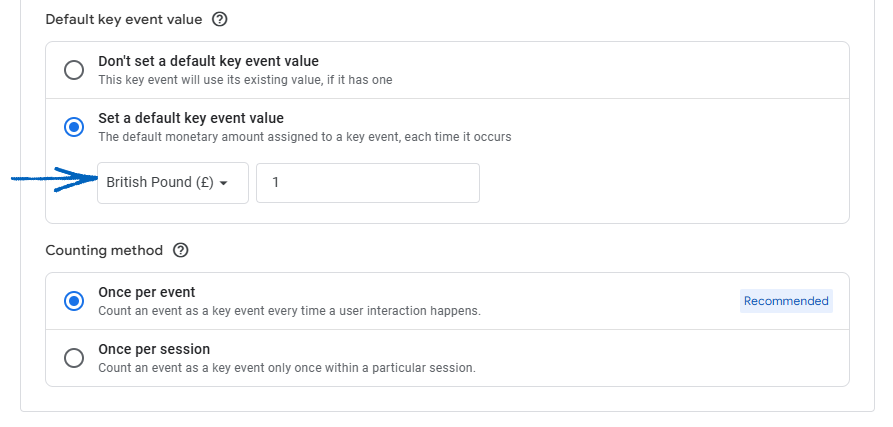
34. In the URL field here, you need to add the URL of the Order Success page from your Checkout Flow that a customer would be redirected to after paying for their order. Copy:
/index.asp?function=PAYMENTCOMPLETE&ordernumber=
into this field and click the Create button in the top right-hand corner of the page: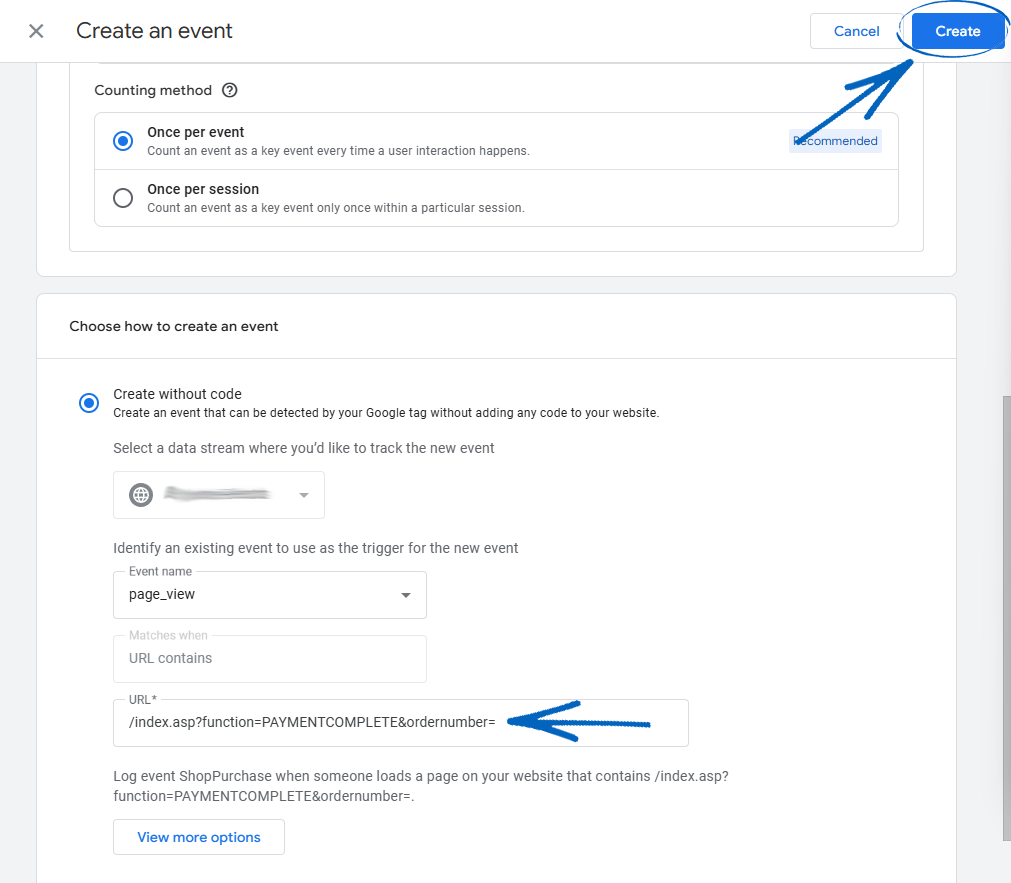
35. Click the X in the top left-hand corner: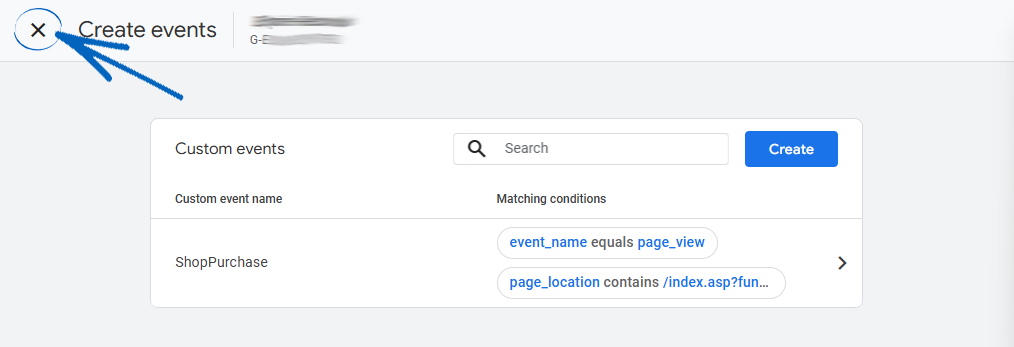
36. When you have finished editing the settings on your Google Tag, click the X in the top left-hand corner:
37. Click Next: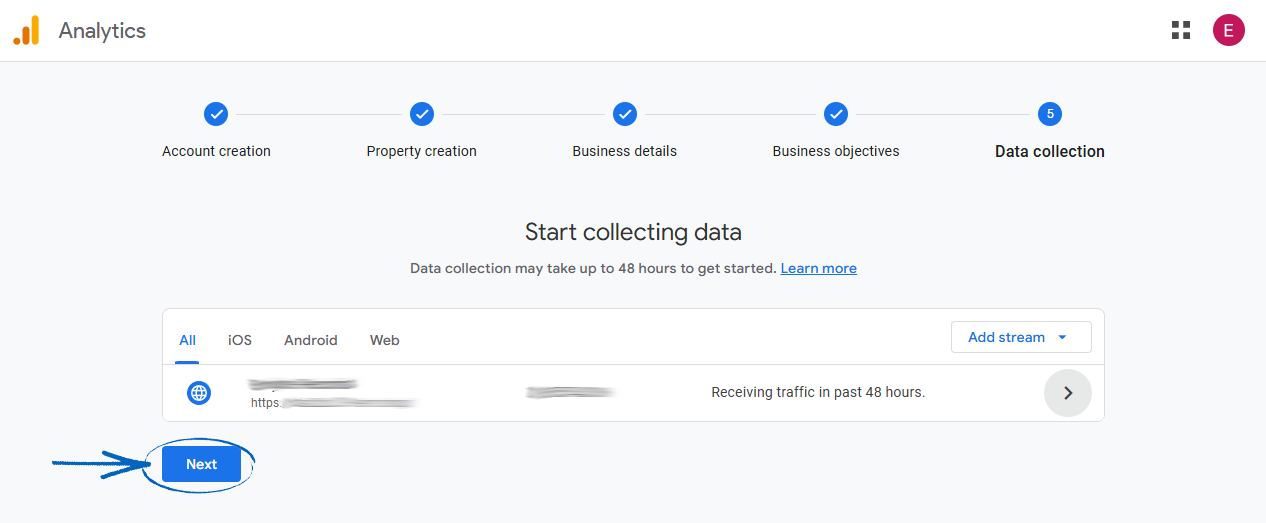
38. Click Continue to Home: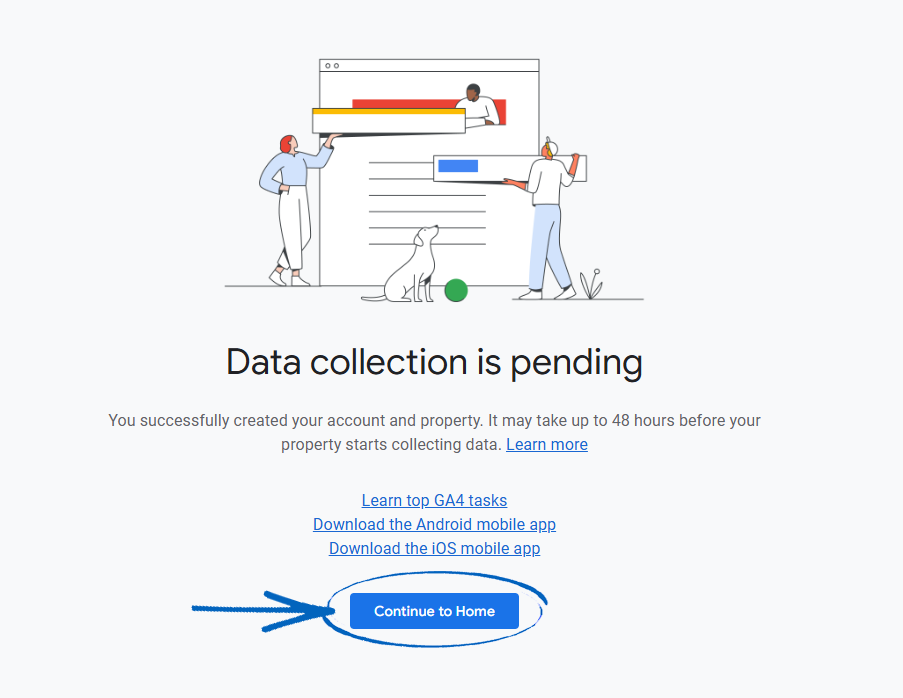
39. Now that you have opened your GA4 account, your next step is to configure tags within your Google Tag Manager (GTM) account by following the steps in this guide.
[caution]When you install GA4 and GTM, you must use the EU Cookie Bar feature and amend the text on your Privacy Policy to advise that you are using tracking cookies on your EKM online shop, in accordance with GDPR legislation.[/caution]
[contact]If you need our help with your EKM online shop, contact your Ecommerce Expert, Account Manager, or the Customer Support Team, who can point you in the right direction. Our opening hours are 9 am - 5.30 pm Monday to Friday, for telephone calls, live chats, and emails. Outside of these hours, you can leave a message for us in the live chat window or email support@ekm.com, and we will answer as soon as possible. If you'd like to suggest a feature or an upgrade on any of the EKM platforms, please let us know on the EKM Suggestions Board. [/contact]