[intro]Before you begin this Guide, you should read this one first. When you have completed this Guide, you will have successfully configured the third of the Checkout Steps in the Checkout Flow of your EKM online shop. [/intro]
[summary]
- Additional Information Fields
- Short Text Box
- Long Text Box
- Drop Down List
- Checkbox List
- Date Picker
- Payment Buttons
[/summary]
[caution]You won't be able to edit these settings if your EKM online shop is on the Lite Tier. You will need to upgrade by following the steps in this Guide. [/caution]
1. Hover over this step and click Edit Settings:

2. This will take you to the Order Summary page, where you can configure what information you would like the display on this page of the Checkout Flow:

3. The Order Summary is the last page that the customer sees before the Order Complete Page (if they’re paying using an offline Payment Gateway) or in the case of a third-party Payment Gateway, it’s the last page they see before being automatically redirected to the third-party site to complete their transaction.
Additional Information Fields
Although it can be very tempting to add one of each kind of Additional Information field to your Order Summary page, you need to carefully consider what it is that you include and what you don’t. Too many enforced fields and boxes can make for a bad customer experience, especially if they’re in a hurry and don’t want to tell you how they found your shop or tick boxes for gift wrapping their Products. Keep your Additional Information Fields to a bare minimum, and only enforce them if you absolutely have to, allowing your customers to skip the superfluous ones so that they can complete their order quickly.
1. Click the Edit button on the far right-hand side:

2. This will reveal an empty page. Click the green Add Field button:

3. This will reveal a list of all of the possible fields that you could add to your Order Summary:

Short Text Box

Long Text Box

Drop Down List
Checkbox List

Date Picker

Obviously, what you choose will depend on what kind of products you sell on your EKM online shop and how you intend to sell to your customers:
Setting up the different Additional Information Fields
Short Text Box
1. Click Select Field Type on the right-hand side:

2. You will then see the page where you can configure your Short Text Box:

3. You will need to complete the Field Name and Field Description and choose whether you need to tick the box to enforce this field. Short Text Box Additional Information Fields are perfect for business-to-business shops which require customers to enter a Purchase Order Number upon completion of their order. When you have finished completing the fields, click the green Add Short Text Box button on the right-hand side.
Long Text Box
1. Click Select Field Type on the right-hand side:

2. You will then see the page where you can configure your Long Text Box:

3. You will need to complete the Field Name and Field Description and choose whether you need to tick the box to enforce this field. Long Text Box Additional Information Fields are typically used for customers to enter any Delivery Instructions for their order. When you have finished completing the fields, click the green Add Long Text Box button on the right-hand side.
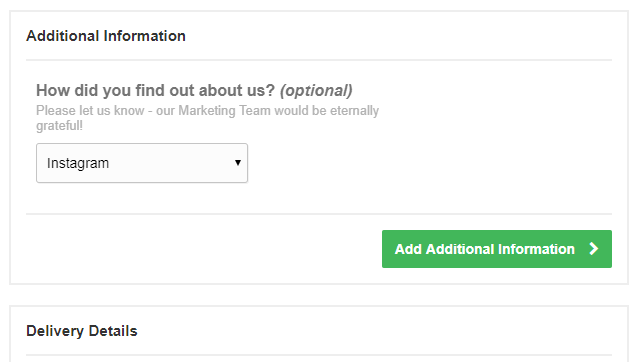
Drop Down List
1. Click Select Field Type on the right-hand side:

2. This will then reveal the fields that you need to complete:

3. The most common way that the Drop Down List is used is for Gift Wrapping. If you wanted to configure your Drop Down List for this purpose, you would complete your fields something like this, before clicking the green Add Drop Down List button on the bottom right-hand side:

[remember] Any prices that you add within these fields will be added to your customer’s order automatically. [/remember]
Checkbox List
1. Click Select Field Type on the right-hand side:

2. The Checkbox List is most commonly used for ‘How did you hear about us?’ surveys, where customers can tick the boxes to indicate how they discovered your EKM online shop. If you wanted to set this up, you would need to configure your fields like this, before clicking the green Add Checkbox List button on the bottom right-hand side:

Date Picker
1. Click Select Field Type on the right-hand side:

2. This will reveal the fields you need to complete to configure your Date Picker:

3. You’ll need to complete your fields like this:

4. Select the Theme of the Date Picker by using the drop-down menu:

5. When you have selected the Theme, you then need to click the green Add Date Picker button on the bottom right-hand corner:

Payment Buttons
1. Here you can edit what logos are displayed on each of your payment methods. Click the Edit button on the far right-hand side:

2. On this page, you’ll see your different Payment Methods listed. Click the Edit button on the far right-hand side:

3. This will reveal a window where you click a logo to add it to your Payment Gateway. When you have selected the relevant logos by clicking on them, you simply need to click the green Save button:

4. You’ll then see the logos listed next to your Payment Gateway:

5. On the Checkout Flow, the Payment Gateway will now display like this:

Now you have configured these settings, click here to move on to completing the next Checkout Step.
[more]
- Settings - Checkout
- Checkout Steps - Customer Login
- Checkout Steps - Customer Details
- Checkout Steps - Payment Gateway
- Checkout Steps - Order Complete
[/more]
[contact]If you need our help with your EKM online shop, contact your Ecommerce Expert, Account Manager, or the Customer Support Team, who can point you in the right direction. Our opening hours are 9 am - 5.30 pm Monday to Friday, for telephone calls, live chats, and emails. Outside of these hours, you can leave a message for us in the live chat window or email support@ekm.com, and we will answer as soon as possible. If you'd like to suggest a feature or an upgrade on any of the EKM platforms, please let us know on the EKM Suggestions Board. [/contact]